Wrapping Up Lighting
Before we break for the mid-semester recess and move on to the wonderful world of color grading, there are a few last tips and techniques I’d like to discuss.
There are also some great videos that have been posted to the Blog Posts section of the site, so be sure to check those out when you get a chance!
Shooting Log and Other Camera Settings
If you pay attention to the wold of indie filmmaking, you’ve probably heard people extol the wonders of “log” settings on various cameras. Different manufacturers use their own log variants: high-end Sony cameras come installed with S-Log (usually multiple versions), Panasonic has V-Log, Canon has C-Log, and so on. So what is a log setting and why do people get so excited about it?
Simply put, log is a camera setting that lowers the contrast and saturation of the image being recorded; a “flat” picture profile. Log footage is pretty unpleasant-looking at first – milky, bland, and washed-out. Log footage comes to life in the color-grading process when saturation and contrast is added back into the image. Because you are starting with more of a blank slate, log footage can be color graded and tweaked more aggressively in post-production.
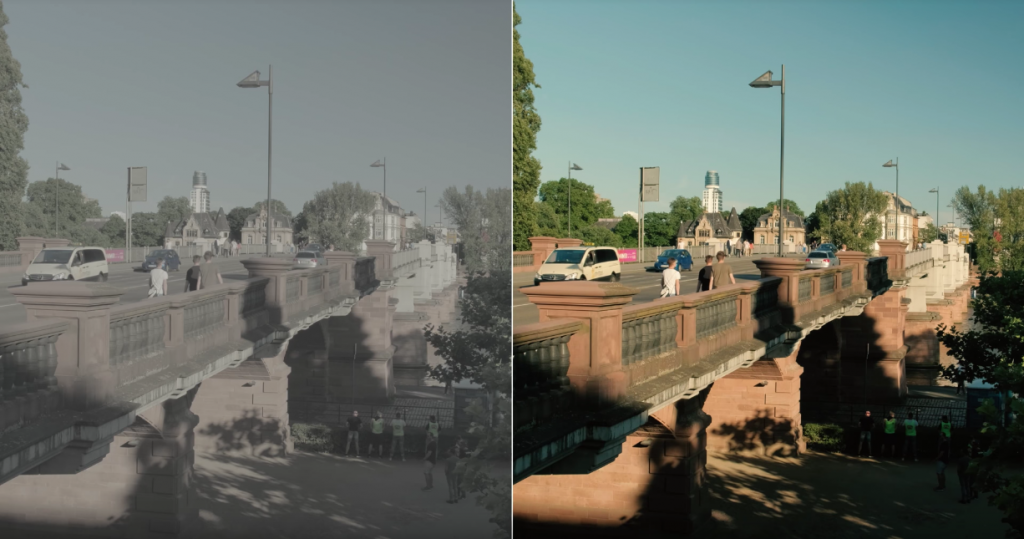
So should you always be shooting using a log profile? Actually, no. Because log footage has low contrast, it protects the details in both shadows and highlights. That makes it great for shooting environments with very bright areas and very dark areas. However, if you’re in a situation where you don’t need to recover details from both the shadows and the highlights, there really isn’t much point to shooting log – you’d only be adding unnecessary work later.
There are also lots of cases where you definitely should not use a log profile. Because log footage requires intensive color grading, it can actually create more prominent noise and grain in the dark areas. In low-light shooting, log footage can end up looking much worse than footage shot with a normal picture profile. If you are taking the time to properly light and expose your image – so that you are capturing what you want in-camera – then shooting log might be unnecessary or even negative. You should avoid log shooting when filming against a green screen, since you want the screen itself to be as saturated as possible.
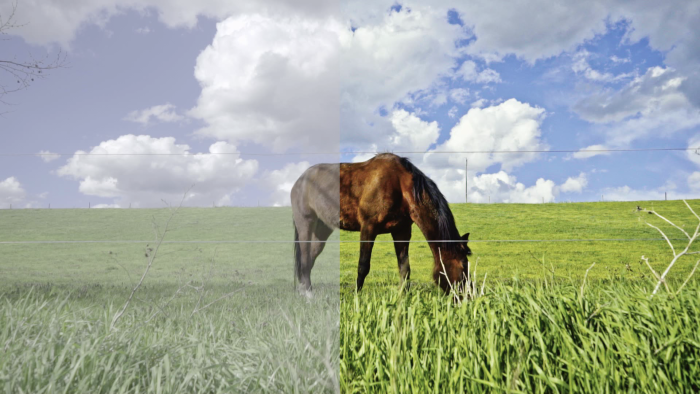
The way your camera records video files also makes a difference as to whether or not you should shoot log. Without getting too technical, cameras that use low compression (4:2:2 as opposed to 4:2:0) and capture lots of color information (12 or 10-bit as opposed to 8-bit) using a robust codec (RAW or ProRes as opposed to H.264) will do better with log footage. In our collection, the BlackMagic Pocket Camera and Sony FS5 are better suited to using flat picture profiles than cameras like the GH3 and AF100.
Finally, shooting log can be problematic because it’s difficult to imagine what your finished footage will look like when everything is desaturated and grey – it can even be challenging to light and expose correctly, since the footage appears so flat. However, some cameras and external monitors (like our SmallHD DP7-Pro) will allow you to load a LUT (essentially a color-grading preset) and preview your footage with a more finished look.
In summary, log recording is potentially useful, but it definitely has a time and place – I think that lots of inexperienced shooters record in log simply because they can. We’ll look at the specifics of color grading log footage later in the semester.
Whether or not you shoot log, there are other camera settings that you may want to tweak before filming. Our Panasonic GH3 and GH4 cameras have several picture profiles available, with different levels of saturation, color balance, and contrast. This becomes a matter of personal preference, but I like the “Natural” profile on these cameras, since it has a slightly lower contrast “filmic” look, without dipping into the flat look of a log profile.
On cameras where such things can be tweaked, you may want to slightly turn down the sharpening, contrast, saturation, or noise reduction. Doing so will give you more flexibility in post-production – all of those factors can be quickly added back using editing or color grading software – while avoiding the potential pitfalls of shooting log.
Problematic Practicals
We’ve talked about practical lights – lights that are visible within the shot – quite a bit already. Practical lights are great for adding ambience and “motivating” the lights that you have placed off-camera. However, sometimes practical lights can cause unexpected issues when filming.
Flicker is the most common problem you are likely to run into. You may notice that certain light fixtures and screens pulsate when filmed. This is the result of the interaction between the frequency at which the light is emitted and the shutter speed of the camera.
Fortunately, this fix is usually pretty simple. You probably can’t change the frequency of the light in the shot, but can change your camera’s shutter speed. Adjusting it up or down will almost always clear up the issue. Of course, changing the shutter speed will affect your exposure – and, to a lesser extent, the amount of motion blur in the shot – so you don’t want to alter it more than you need to. However, it’s almost always easier to fix this issue on set than try to salvage the footage in post-production later.
The other common issue with practical lighting is color temperature. Professional video lights are specially calibrated and tested to emit light of a certain color (or be adjustable as needed). Random lightbulbs on set are not. The lights in your scene may be warmer or cooler than the lighting you would like to use. If this is the case, I’d suggest adding some CTO or CTB to the light to take care of the issue. If that’s not possible, you may need to adjust your off-camera lights and play with the white balance of your camera to resolve the issue.
Lighting Multiple Subjects
This topic has been asked about a few times, so I thought I’d address it. Most of the time, you will probably be lighting primarily for one subject – even in shots with multiple actors, most shots will be focused on one of them. In wide shots, master shots, and shots with multiple subjects, however, you may need to light multiple actors.
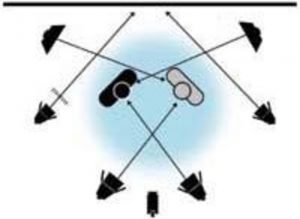
Lighting for multiple subjects isn’t really any different than lighting a single subject: if both actors are facing the camera, they should both have key lighting, fill lighting, and back lighting, in addition to any lights illuminating the background. Depending on how your actors are positioned, you may be able to use the same key, fill, and/or back lighting for both of them; or, you may need two sets of lights.
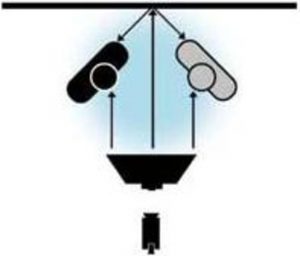
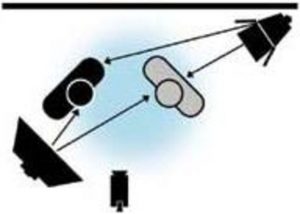
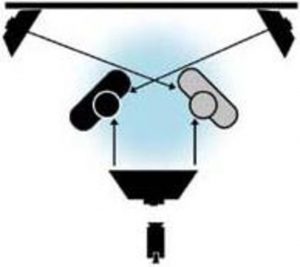
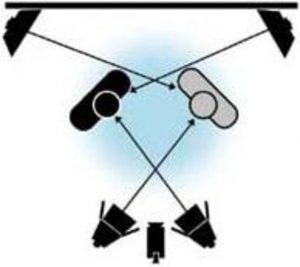
There are alternative methods to lighting multiple subjects, though. I found the following lighting diagrams in an old issue of Videomaker Magazine.
