To Log Or Not To Log
We talked in an earlier lesson about the pros and cons of filming with a “log” recording mode – a picture profile that decreases saturation and contrast to provide flexibility in post-production. I mentioned then that shooting in log was not always the best idea – it can introduce noise into low-light footage and make things like green screen compositing more difficult. Shooting log does have advantages, though – it can give you a degree of freedom in the color grading process that you simply don’t have if you are recording normally. It also makes it easier to correct issues like improper white balance, since the color saturation isn’t as intense. While I still hold that getting your footage right “in camera” is the best approach, knowing how to use log footage is an important skill. Often, that involves applying a LUT.
LUT stands for Look Up Table – it’s a small file that applies preset color grading values to a piece of footage. There are several kinds of LUT files, but the one you will probably encounter the most often is the .cube file. Because the LUT applies presets across a variety of parameters – contrast, saturation, color balance, and more – it’s important that the footage you start with be fairly neutral. Hence the importance of log color profiles. A LUT can certainly be applied to non-log footage, but the result will probably be footage that has been graded too severely.
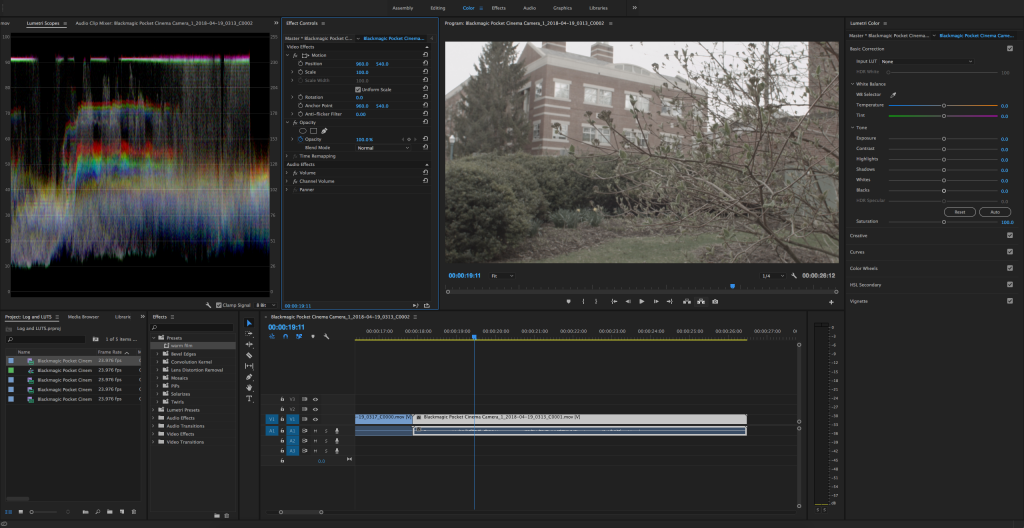
Also because of this, log footage is pretty bland and unattractive when you first import it. Colors – especially skin tones – are muted and grey. Because you are going to be grading log footage pretty aggressively, you want to be using footage that can stand up to a lot of manipulation. Footage captured at a high bitrate will do better, as will higher quality codecs, such as Apple ProRes and raw formats. Older cameras, such as our AF100 and GH3 models, capture footage with more compressed codecs and lower bitrates, so using a flat profile won’t work as well. The BlackMagic Pocket Cinema Camera and Sony FS5, on the other hand, have flat profiles built in and produce high quality (and larger) video files that can withstand aggressive grading.
Applying A LUT
In Premiere, you can apply a LUT using the same Lumetri Color interface that we’ve been exploring over the last few weeks. At the very top of the panel, in the Basic Correction section, you’ll find the Input LUT dropdown menu. Premiere has a handful of LUTs built-in; these correspond to the formats of various cameras. The options are fairly limited, though.
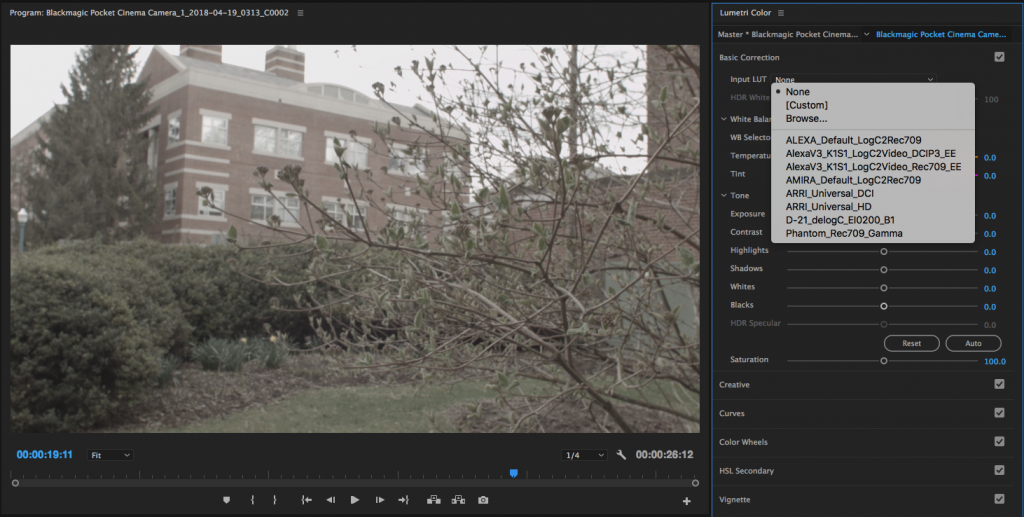
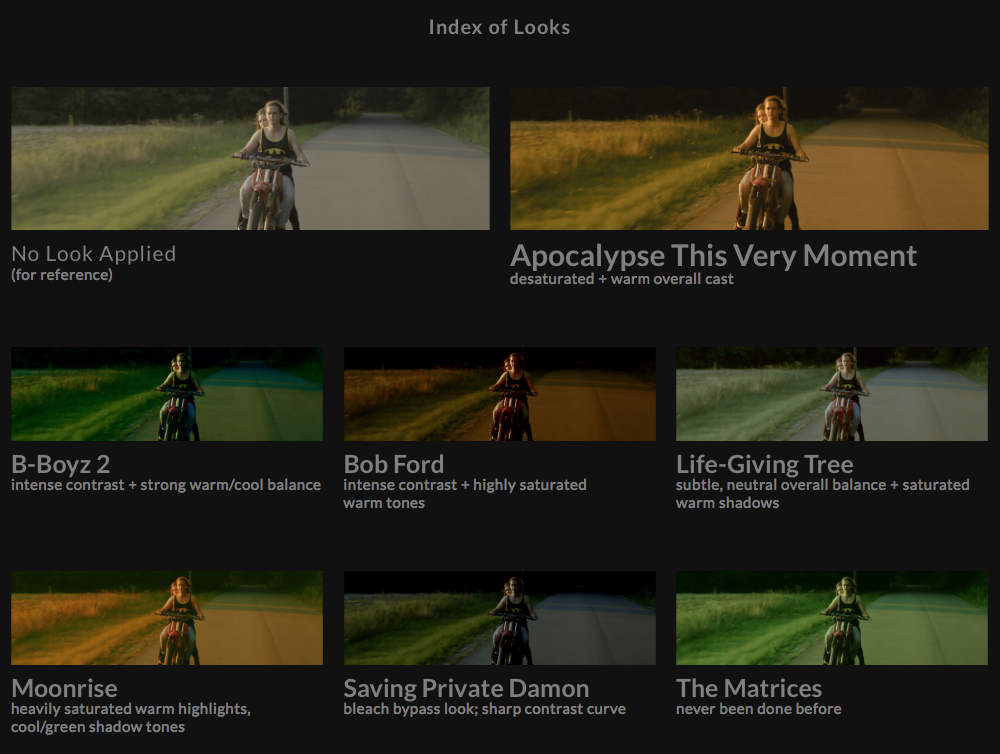
Fortunately, LUTs are pretty easy to find. If you do a quick internet search, you’ll find a ton of free options, as well as LUT packs for sale. Here’s a list of just a few places to download free LUTs, including great stylistic packs from RocketStock and SmallHD.
To apply a LUT to your footage, highlight it in the timeline and select Browse… from the Input LUT dropdown menu in the Lumetri Color panel. Select the appropriate file and your footage should immediately transform. Unfortunately, it’s impossible to tell what the effect of the LUT will be until you apply it, although sometimes reference images are provided by the developer.
After you apply the LUT, you’ll notice that none of the individual parameters within Lumetri have been changed. The LUT packages all of its adjustments together into one file. You can continue to tweak the overall look of the footage using the various parameters within Lumetri, but you cannot make adjustments to what the LUT itself is doing – it’s either applied or it isn’t.
LUTs can also be applied in the Creative section of the Lumetri Color effect. This allows you to make very basic corrections to your footage (such as white balance issues) before the LUT is applied. Just go to the Look dropdown menu and select Browse… to navigate to the file.
Make Your Own
You can also use Premiere to create your own LUTs, which can be very helpful when working on a larger project. To do so, make your adjustments as you normally would within the Lumetri Color panel. When you are satisfied with the look of the footage click on the “three lines” icon at the very top of the panel (next to the words Lumetri Color). Select Export .cube… and you’ll be asked to input a name and set a location for the LUT to be saved.
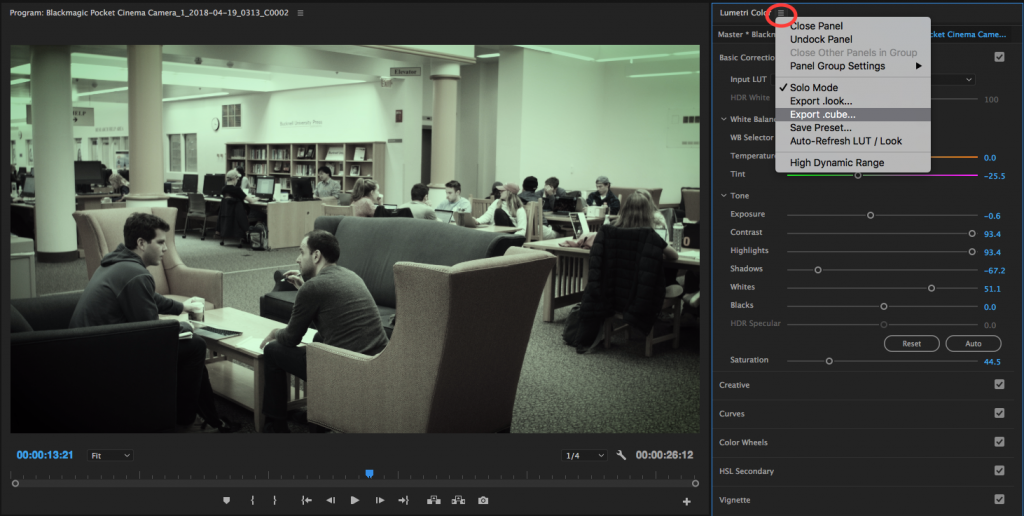
What’s cool about saving a .cube LUT in Premiere is that you can use that file to color grade footage on another machine – or even in another piece of color grading software, such as Final Cut Pro, After Effects, or DaVinci Resolve. Just bring the .cube file and you’ll be able to quickly apply the same look in whatever software you happen to be using.
LUTs Versus Presets
If you want to maintain the ability to make adjustments to the look by tweaking its individual parameters, you may want to save your grade as a Lumetri preset instead of a LUT. You do this in basically the same way as saving a LUT: click the icon at the top of the panel and choose Save Preset… from the options. You can also get to Save Preset… by right-clicking on the name of the Lumetri Color effect in the Effect Controls panel. A menu will pop up and you can enter a name and description for the preset. You can leave the other settings in the menu at their defaults.
The preset file won’t appear as a new file on your computer, like the LUT does – instead, it will show up in the Presets section of the Effects panel. To apply it, you can click and drag it from the menu, or double-click on it with the appropriate clip highlighted in the timeline.
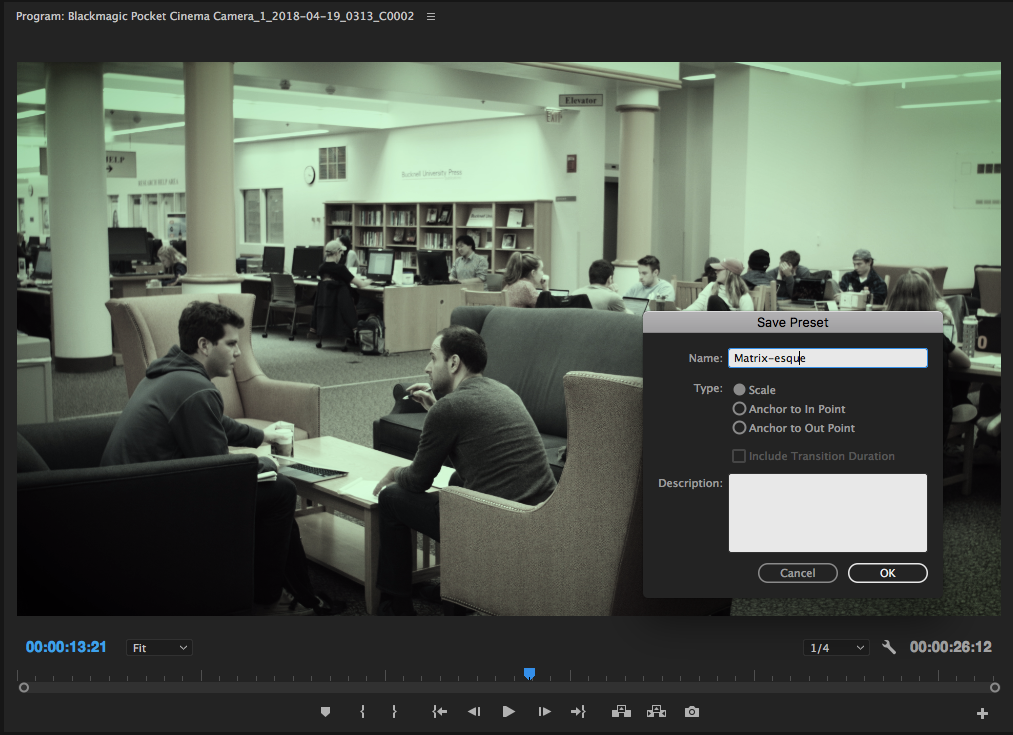
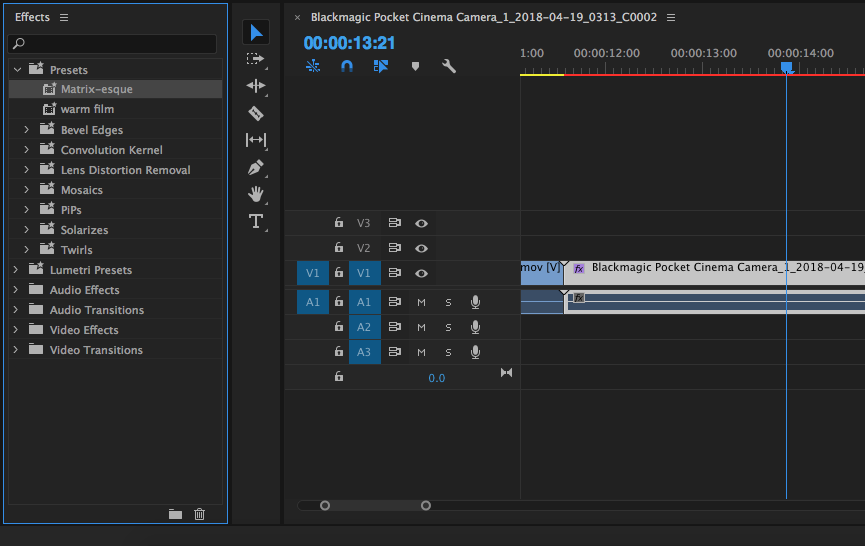
The downside of creating a preset instead of a LUT is that you won’t be able to bring that look into another color grading application (like Resolve). Since Lumetri is unique to Premiere, it will only function within that software. However, if you plan on only working in Premiere and want the ability to further adjust the various parameters of your grade, presets are a good option.
LUTs have become increasingly popular over the last few years. Many cameras and external monitors allow you to load a LUT onto the device and view a preview of what the footage will look like with it applied. This allows you to shoot in a flat picture profile, but still get an idea of what your graded footage will be like. LUTs aren’t always the best option, but they can be a fun and useful creative tool.