Stops of Light
In the first lesson, we discussed the basic properties of light: its color value, measured in degrees kelvin; and its brightness, measured in lux or foot-candles. However, there is another measure of light that you will probably hear discussed in relation to photography and video: the “stop.” It’s common to hear photographers talk about gaining or losing a stop of light – so how much light constitutes a stop?
Measuring light in stops is different than measuring light in lux, in two important ways. First, stops are used when measuring the amount of light coming into a camera, as opposed to the amount of light on the subject being photographed. Second, a stop of light describes light in relative terms, not absolute ones. Every time you add a stop, you are doubling the amount of light; and every time you lost a stop, you are cutting the amount of light in half.
Have you ever noticed that on most cameras, the ISO values double with each increment? Most cameras start at ISO 100, then jump to 200, then 400, 800, 1600, and so on. It makes sense that a camera set at ISO 800 is twice as sensitive to light as a camera set at ISO 400, which means that going from 400 to 800 adds a stop of light. Shutter speed works the same way: going from a shutter speed of 1/30 of a second to 1/60 of a second takes away a stop of light and vice versa. Aperture is the same, although the numbers aren’t quite as logical: you double amount the light going from f/1 to f/1.4, then f/2, f/2.8, f/4, f/5.6, f/8, f/11, f/16, and finally f/22.
Here’s a chart breaking down the stop measurements across ISO, shutter speed, and aperture:
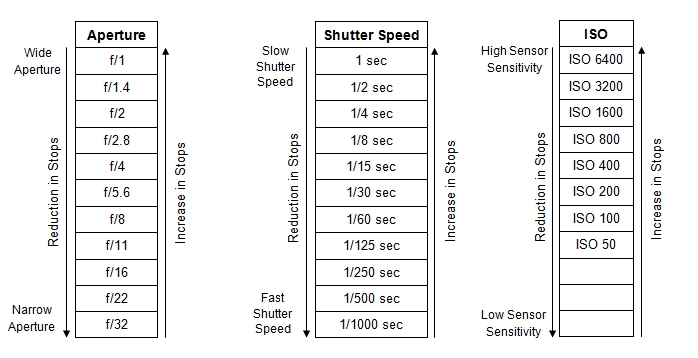
Measuring light in stops is useful because it allows us to compensate these various factors and maintain the same exposure. If I decide to move from f/4 to f/2.8 to gain a shallower depth of field (going up one stop), I can compensate my changing my ISO from 400 to 200 (going down one stop).
Thinking of light in terms of stops can be a bit confusing at first, but it’s really useful for getting – and keeping – proper exposure with your camera. As we start to experiment with different lighting setups, we’re also going to need to make sure that the cameras we use are getting the images we want. That means controlling the exposure.
Light Meters
One of the most valuable tools for getting correct exposure and creating different lighting looks is the light meter. Here’s a short video showing a light meter in action:
https://youtu.be/8lMTUszr6P4
We have two light meters in our equipment collection: a digital meter and an analog meter. The both do the same thing, but you operate them in slightly different ways. Here are video instructions for both:
Terminology
- Hard Light and Soft Light
These terms refer to the quality of the light being emitted. Hard light has a sharp edge and creates harsh shadows. Soft light has a diffuse edge and tends to wrap around things, creating subtler shadows. Hard light tends to be dramatic while soft light tends to be flattering. Generally speaking, large light sources (or lights close to the subject) create soft light and small light sources (or lights far away from the subject) create hard light. - Spot and Flood
Spot and flood are the two extremes of a light’s “throw.” Spot describes light that is concentrated in a small area, generally with a well-defined edge. Flood light is spread over a wide area, generally with a soft edge. Some lights, like fresnels, are focusable, allowing you to go from spot to flood. - Contrast Ratio
Contrast ratio describes the amount of light in two different areas of a shot – generally, the two sides of the subject’s fac. For example, a contrast ratio of 4:1 on the subject’s face would have four times as much light on the key side as the fill side. - High Key and Low Key
These terms are related to the overall look of a shot, in terms of its contrast between light and dark areas. A high contrast shot with dark shadows is low key and a low contrast shot is high key. - Key
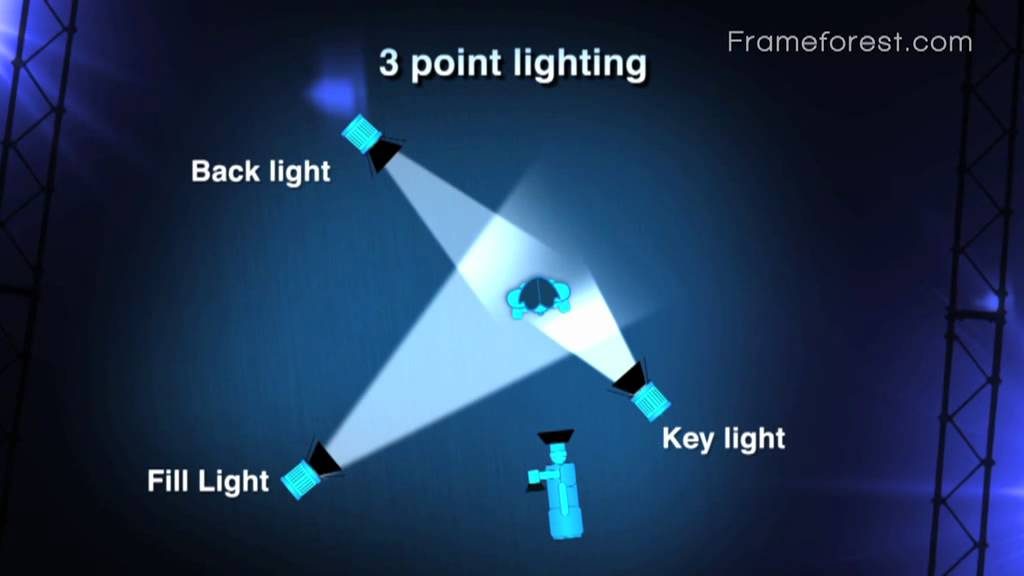
This is the main light illuminating an actor in a scene. It should be placed in front of the subject and off to one side, creating shadows on half of the face. Be careful not to confuse the key light with high or low key lighting - Fill
The fill light softens the shadows created by the key light and adds illumination to the side of the face not illuminated by the key light. As such, it should be placed in front of the subject on the opposite side from the key. The fill light should be set to an equal or lower intensity to the key – if it is greater, it becomes the key. - Rim/Back/Hair
The back light is the third light in a classic “three point” setup. It is placed behind the subject, generally on the same side as the key. The back light is used to create an edge of light on the subject and provide visual separation between the subject and the background. - Bounce
Bounce lighting is reflected off a surface before hitting the subject. Lighting can be bounced off of a reflector, a white card, a wall, the ceiling, or just about anything else. - Practical
Practical lights are the lights that are visible in the scene – for example, a lamp in the background of a shot. You can place practical lights in a shot to correspond with the off-camera lights you are using to make a scene look as though it is light naturally. - Ambient
The light that exists in a space before it is lit is its ambient light. Light coming in through a window is one example.
Three Important Points
You’ve probably heard the term “three point lighting” about a million times. It’s often described as a “basic lighting technique,” but I think that description is actually a bit misleading. Saying that three point lighting is a “basic” technique implies that there are more advanced methods that presumable use more lights: say, five point intermediate lighting and seven point advanced lighting. That’s not the case.
Three point lighting isn’t a basic technique, it’s a fundamental technique – the fundamental technique – for lighting a subject. There may be dozens of lights set up for a shot, but the subject (the actor, generally speaking) will still be lit using three point lighting. That’s because three point lighting describes how we see other people every day, with different levels of light and shadow.
When you are outside, you are probably being primarily illuminated by the sun – that makes it the key light. The sun can be a hard or a soft light, depending on the weather and time of day; overcast days are generally considered great for filming, since the light is diffuse and flattering.
Depending on the sun’s location, it will cast shadows on one side of your face or the other, but these shadows are softened by the other lights in the environment: either light from the sun that has been reflected off of other objects or other sources of nearby illumination. These softening lights are the fill.
Finally, there is almost always light coming from behind you – usually either the sky or some reflected light from the sun. If this light overwhelms the light of the sun (the key light), you will be silhouetted; if it is fainter, it will wrap around you from behind as a rim of light. This is the back light.
You don’t need to go far to find this “natural three point lighting” – the next time you are outside, just take some time to look at the patterns of light and shadow on the people around you.
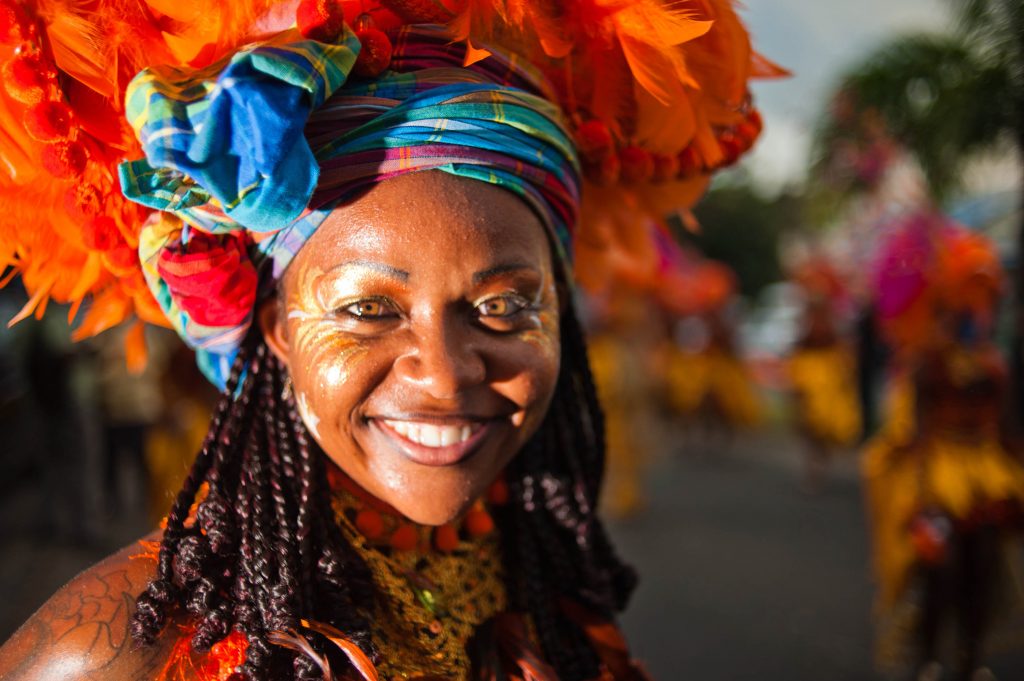

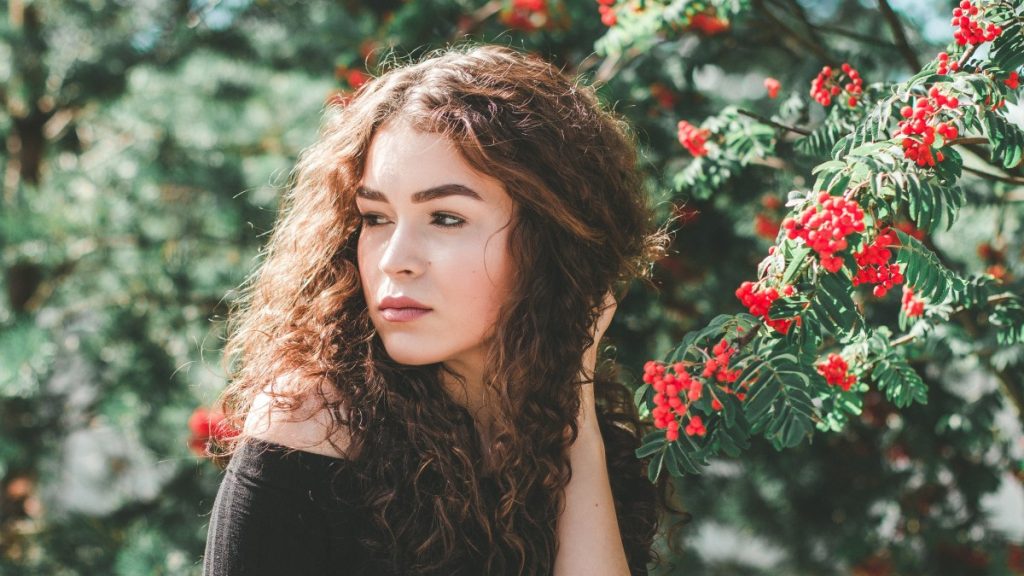
In the studio, we don’t have access to the natural three point illumination of the sun, so we replicate it as best we can. We use a key light to illuminate the face, a fill light to soften the shadows, and a back light to illuminate from behind. This method looks natural because it replicates what we see in nature.
Here’s a video analysis by wolfcrow on how and why three point lighting works:
When you are setting up three point lighting, you have a few factors to consider. How harsh should the shadows be? How intense should the back light be? Which side should the back light be on? These are largely a matter of personal preference and can change from one setup to another. I personally think that the back light looks best on the opposite side from the key, but many lighting diagrams show the opposite. The important thing is to be conscious of how these choices affect your scene.
For a very quick overview, here’s a brief video from Full Sail. There are about a million three point lighting tutorials out there, but this one is concise and accurate.
Contrast Ratios
When we talk about contrast ratios, we are generally talking about the ratio of light between the key side and the fill side of a subject’s face. To measure the contrast ratio, you can take a reading with a light meter on the key side with the fill off, then on the fill side with the key off. Here’s another video from light guru wolfcrow about contrast ratios. He has some specific ideas about measuring contrast ratio in aperture stops that I don’t find totally logical, but the general idea is the same.
https://www.youtube.com/watch?v=S_hyiLZiggk
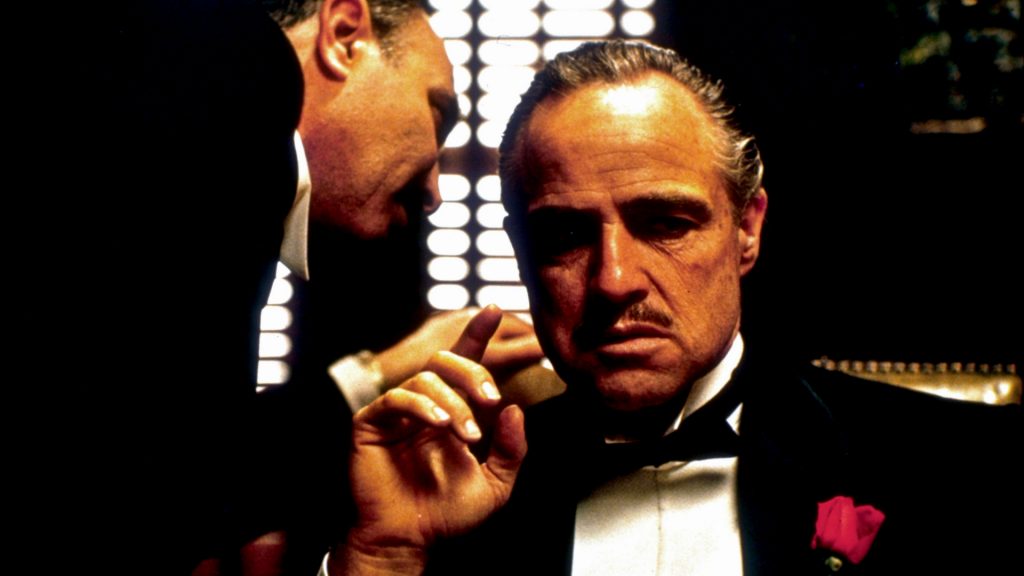
Contact ratio is incredibly important because it can really help establish the mood of a piece. You will often see a high contrast ratio on highly dramatic or tense films. Look at how dark the shadows are on Marlon Brando’s face in this shot from The Godfather.
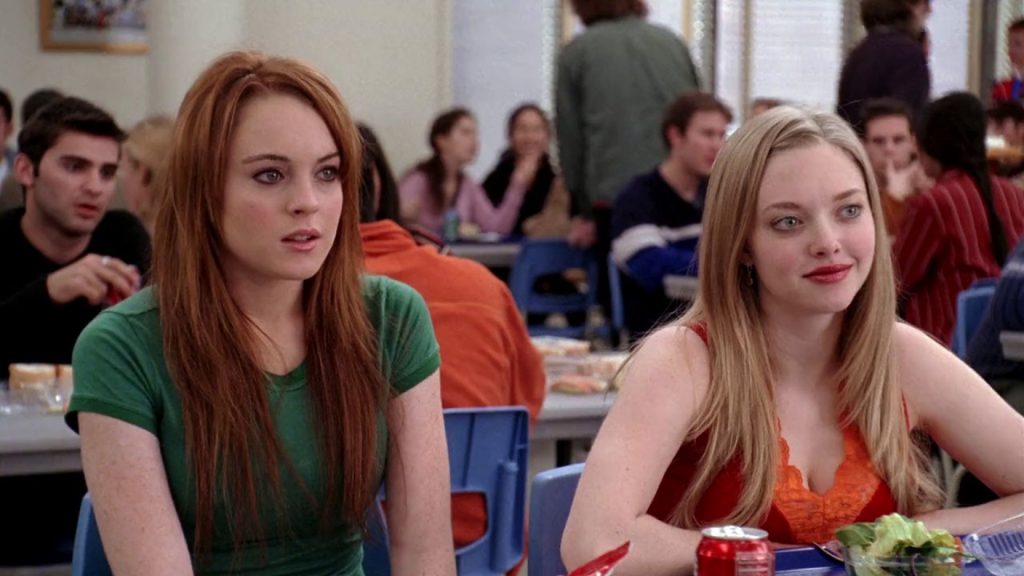
A low contrast ratio is often used on films that are meant to be lighthearted, such as comedies. Since low contrast lighting is usually flattering, it’s also used on romances. Look at how even the lighting is in this shot from Mean Girls.
In terms of actual numbers, an average contrast ratio is somewhere around 4:1. In a film with high key lighting, the faces of the actors might be lit with a contrast ratio of 3:1 or 2:1. Ratios lower than 2:1 are not often used, since at that point you start to lose the details of an actor’s facial features. Films with low key lighting might use a contrast ratio of 6:1 or 10:1 or higher – the greater the contrast ratio, the more dramatic the lighting.
Project 2: Faces In The Dark
For the next project, we are going to work as a group. Set up a key, fill, and back light in front of a black backdrop. Using the same key light, we’ll adjust the fill to create different contrast ratios: low contrast (less than 4:1) for high key shoots, average (around 4:1), and high contrast for low key shoots (greater than 4:1). Everyone should take turns being in front of the camera so that the entire group gets a chance to operate the equipment.